ABOUT | TECH INFO | Q&A  | CATALOG | SHIPPING | CONTACT | HOW to ORDER | CUSTOMERS COMMENTS
index.gif (1853 bytes)  ShipCharges.gif (2148 bytes) online3.gif (4005 bytes)


Unlimited Products  (760) 948-0055
Toll Free (877) 735-7772 (7:00 to 4:30 Pacific Time) Mon-Fri.
 

 # Glassing in a scoop (general description)
 # Detailed instructions for installing fiberglass scoops to fiberglass hoods
 # Detailed instructions for installing fiberglass scoops to steel hoods
 # Mounting scoops with inside flanges

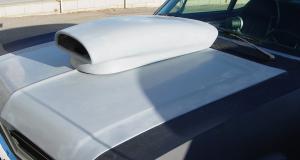
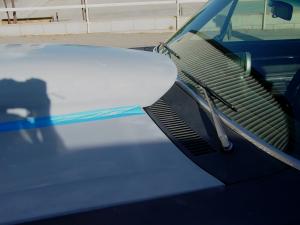
Install of SC204 on 1968 - 1974 Nova
       
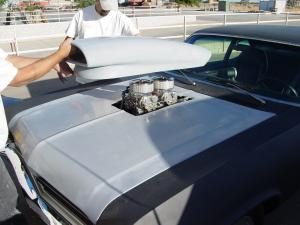
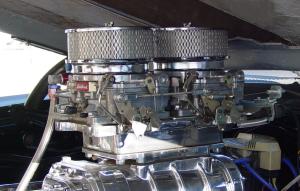
Cut hole in hood to clear intakes

     
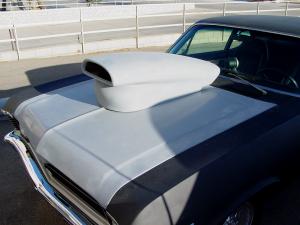
Place scoop in desired position and cut scoop down to required height


Tape scoop to hood and check for clearance at windshield


step-1.jpg (3321 bytes)
'Glassing in a scoop

All Unlimited's scoops are made thick enough along the sides so they will not fail when 'glassed' in.

After determining the position and height needed, cut off base of scoop to desired height.

Place scoop on hood in desired position and "trace" scoop base on hood.

Using a 'diamond' edged saw (standard jig saw will work), cut a hole  into the hood along the "trace". This should match the base of the scoop.

step-6.jpg (3006 bytes)Place scoop on hood and flip assembly over.

Using fiberglass matting and cloth, glass scoop into hood. Being careful to lay-up enough glass to firmly attach sccop to to hood.

To finish, hand sand top to a professional look.

Now you have great installation that will not fail at the bond line!
(thinner made scoops have been known to fail along the bond line)


Scoop installation procedure

Fiberglass scoop to fiberglass hood

Use proper masks and eye protection when working with fiberglass!

1. Place scoop on hood in desired position. To determine best position it is best done with hood on car. Measure height of scoop. If scoop is too tall then cut base of scoop to desired size. hen cutting base - contour it to hood shape.

2. Place scoop back on hood in desired position, draw outline of scoop onto hood. Now determine location of rear inner structure of fiberglass hood. It is recommended to leave as much inner structure as possible in the rear. Transfer location of inner structure to top side so you do not cut into inner structure. The hole to be cut will not be as long as the scoop so you do not disturb the inner structure along the rear of the hood. The hole to be cut should be ¼ inch smaller than the outline of the scoop. This will allow you to grind the hole to size later during this install process. (see step 5)

3. Cut out the hood with a jig saw (or grinder with carbide blade). Do not cut through inner structure along the back of the hood.

4. Place scoop back on hood and tag (on top surface only) in 6 places or more with a small amount bondo. Do not use too much, as this ‘tagging’ must be chiseled off later.

5. When bond "tags" are hard, then turn hood assembly over and grind excess fiberglass from hood to match the scoop. Make small radius here as you grind. This radius will allow fiberglass and resin to lay down better.

6. Place hood on saw horses so that scoop does not touch the ground or other objects and is hanging free. Be careful not support hood "flat" areas so that they bow or are distorted. This is very important, since the hole you cut in the hood has exposed the hood to distortion and indents if any pressure is applied to the flat areas. The final "glassing" of the scoop to the hood will hold these distortions and the project will be in trouble.

7. The hood is upside down…Using fiberglass strips 3 inches wide (use fiberglass mat) wet the fiberglass with catalyzed resin. ½ of the strips will be on inside of the scoop, the ½ on the back of the hood. Spread resin evenly with a squeegee or brush.

When using resin and fiberglass to install fiberglass scoops to fiberglass hoods, use ½ the normal amount to catalyst to avoid resin over heating and causing distortion to your final work. Excessive heat during the cure will cause distortion to the hoods flat areas and make for al of extra finishing work.

8. Be sure to work all air bubbles when applying the resin. Let cure for 12 hours.

9. Turn hood and scoop assembly over. Chip away the "tagged" bondo work. (6 places or more from step 4) Sand seam on top of hood 1 inch over on hood and 1 inch up onto scoop. This will allow filler to properly adhere to the surface of the fiberglass.

10. Fill this sanded area with small amounts of bondo body filler. Sand bondo as needed. Additional cross bracing may be needed near the front of scoop at this time. ½ round cardboard tubing, cut to the width of the hood will work for this bracing.

11. You can now sand the entire hood and scoop surface in preparation for paint.


Scoop installation procedure

Fiberglass scoop to steel hood

Use proper masks and eye protection when working with fiberglass!

1. Place scoop on hood in desired position. To determine best position it is best done with hood on car. Measure height of scoop. If scoop is too tall then cut base of scoop to desired size. hen cutting base - contour it to hood shape.

2. Place scoop back on hood in desired position, draw outline of scoop onto hood. Rough the steel hood with sand paper (down to bare metal) in the areas that the scoop will be attached. 

3. Then drill various pop rivet holes through the scoop and the steel hood (approx. 3 inches apart), being careful that the scoop does not move from the desired position. Use flat head type pop rivets and countersink the holes slightly so the rivets can be left in place.

4. Apply fiberglass matting and fiberglass resin along the attachment areas, pop rivet down while the resin is we. Let harden.

5. Grind to flare in the edges of the scoop to the hood surface, apply body filler and smooth out.

6. You can now sand the entire hood and scoop surface in preparation for paint.


For scoops that have internal flanges
:

Flange.jpg (6274 bytes)  

 1. Mark off holes in 10 or more places as needed and drill with ¼" drill bit.


FlangeBolts.jpg (6274 bytes)

  2. Install ¼" bolt washer and T-nut.

  3. Apply body filler around T-nut to hold in place.

  4. When body filler has set up, remove ¼" bolt.
 
  5.Scoop is now ready to be installed on hood.


Included with bolt sets (bolt sets are not included with all scoops that have internal flanges):

10  ¼" Bolts (¼ -20 x ¾ hex, plated)
10  ¼" Washers (Std, plated)
10  ¼" T-nuts (¼-20, 3/8 barrel, plated, 4 prong)

 UP22.com the web's giant-giant site for quality fiberglass. Customers agree, fit, price, quality all come together at UP22.com. Please visit UP22.com frequently to see updates, specials and new items. Or visit our factory in Hesperia CA. You can pick up items (call ahead) or just browse our huge factory. You can request to see our lay-up shop and see how our products are made!


PICTURES AND FURTHER INFORMATION
can be viewed by scrolling down or clicking part number above.

ABOUT | TECH INFO | Q&A  | CATALOG | SHIPPING | CONTACT | HOW to ORDER
index.gif (1853 bytes)  ShipCharges.gif (2148 bytes) online3.gif (4005 bytes)

Toll Free (877) 735-7772 (7:00 to 4:30 Pacific Time) Mon-Fri


Questions about our products, shipping costs, current prices and sales policies can be obtained by calling:
Toll Free (877) 735-7772 or From Canada or other countries - (760) 948-0055
Copyright © 2020 Unlimited Products. All rights reserved.
Follow us on FaceBook